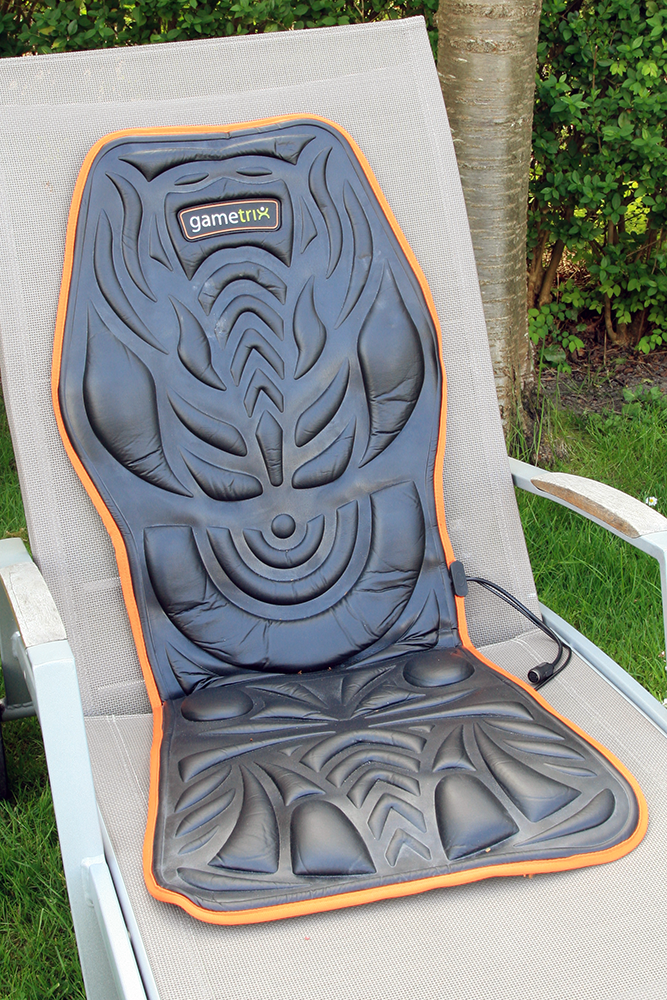
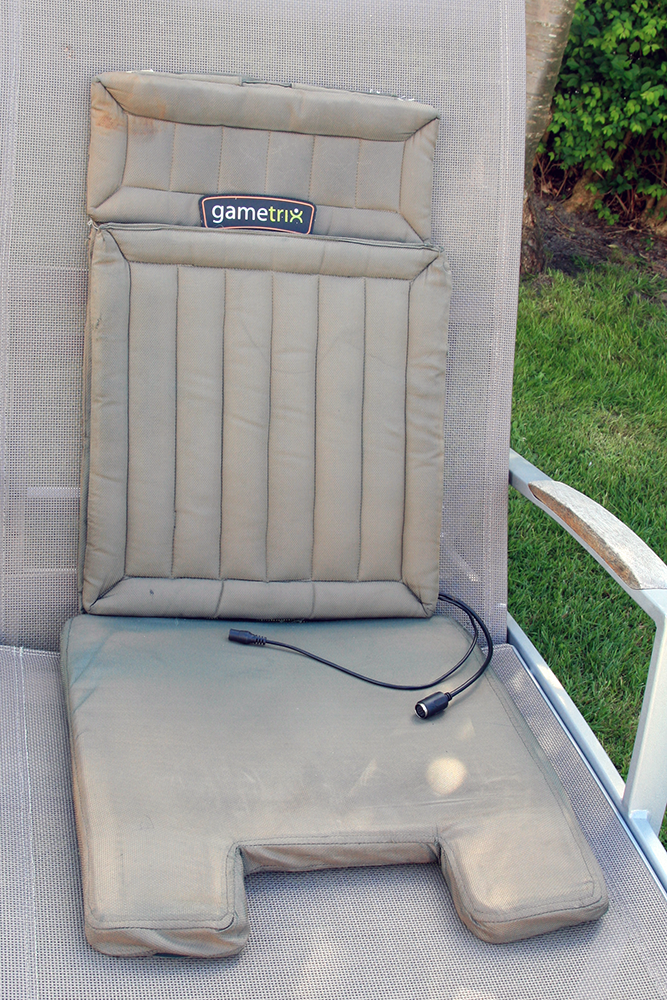
The Jetseat is without a doubt a great addition to my pit. I do believe that sensory feedback is a great asset to overcome to lack of movement in our pits. The Jetseat – originally a massage cushion – provides that sensory feedback through the shared memory.
The best features as far as I’m concerned are the speedbrake effect, the AOA buffeting, G forces and many other details (gun firing is so awesome)
it’s an aspect that some unfortunately influent BMS dev do not understand because they are too much attached to their definition of realism and do not want to understand the need of sensory feedback into any sims to overcome the lack of sensory feedback. I tried for years to make them understand but IMHO their view on this is way too much restricted. Luckily we have the shared memory and the jet seat greatly address that lacking feature in BMS.
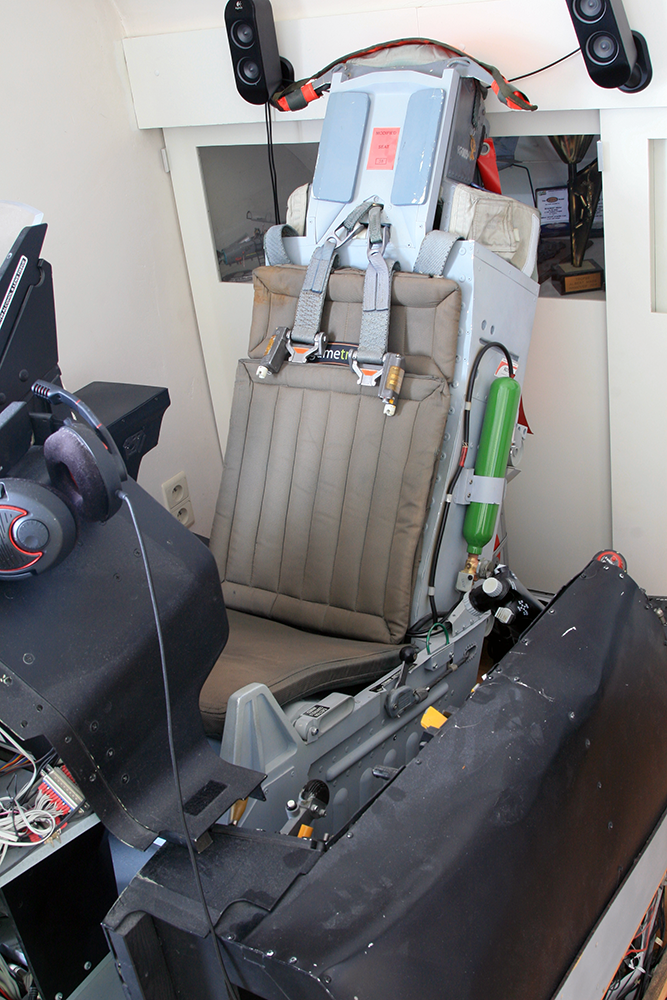
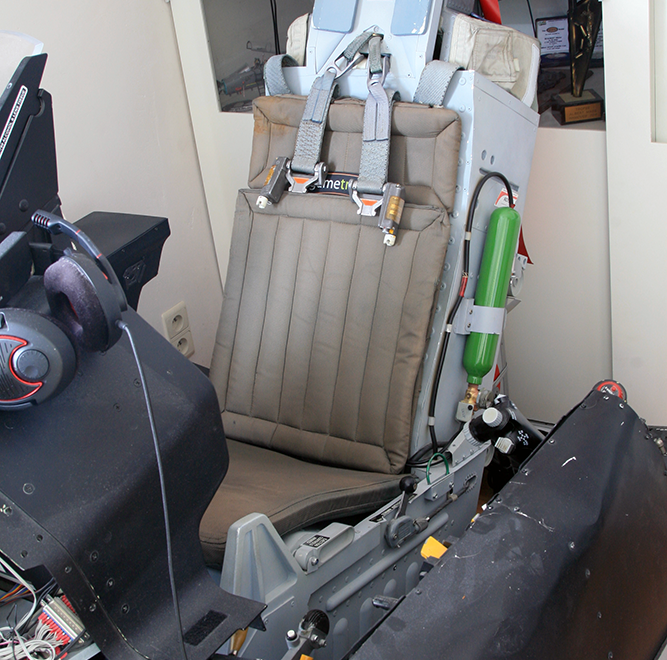
Problem with the jet seat is that although the Gametrix cushion is not ugly, it kind of spoil the look of our cockpits.
For months I used the Gametrix cushion under my aces cushion but it didn’t look right.
since day one I planned on addressing that and moving the innards of the Jetseat into the aces cushion.
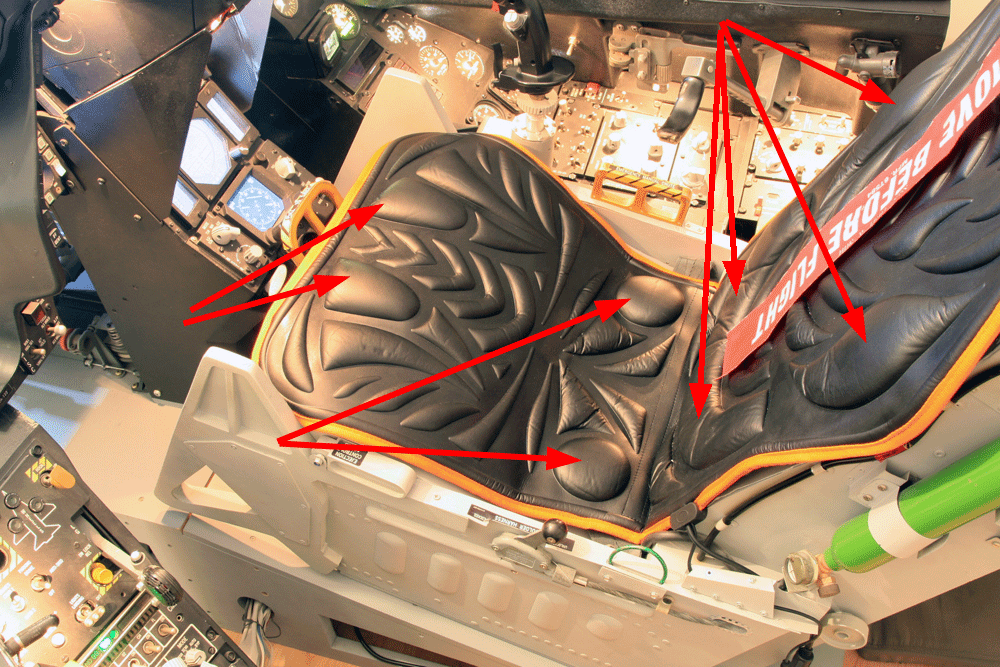
Another issue with the original Gametrix seat is that the 2 front motors of the butt cushion are badly placed when installed on an aces2 reproduction.
the 2 motors are outside the aces 2 seat pan and are ineffective since they don’t rest on solid material. You barely can feel them when flying.
So here is the plan to integrate the motors into the aces 2 cushions:
- The Gametrix could be replaced easily, so destroying it in the conversion process wasn’t really a concern.
(This is not quite true nowadays due to the impossibility to make business with Russia) - The Aces 2 cushions on the other hand are hard to come by and I didn’t want to damage them any more than necessary. The idea is to be able to make the conversion without destroying them and if necessary be able to bring them back to their original status.
- The most obvious issue is that the Gametrix is one unique cushion while the Aces 2 are two separate cushions. the conversion will connect the 2 cushions together with 4 wires which will become the weak point of the assembly and will need to be either protected by attaching the 2 cushions together or placing a connector on these 4 wires to allow easy separation of the cushions. More on that later.
First order of business was to evaluate how to proceed to embed the motors into the Aces 2 cushions without permanently damaging the cushions and evaluate the final location of all 8 motors.
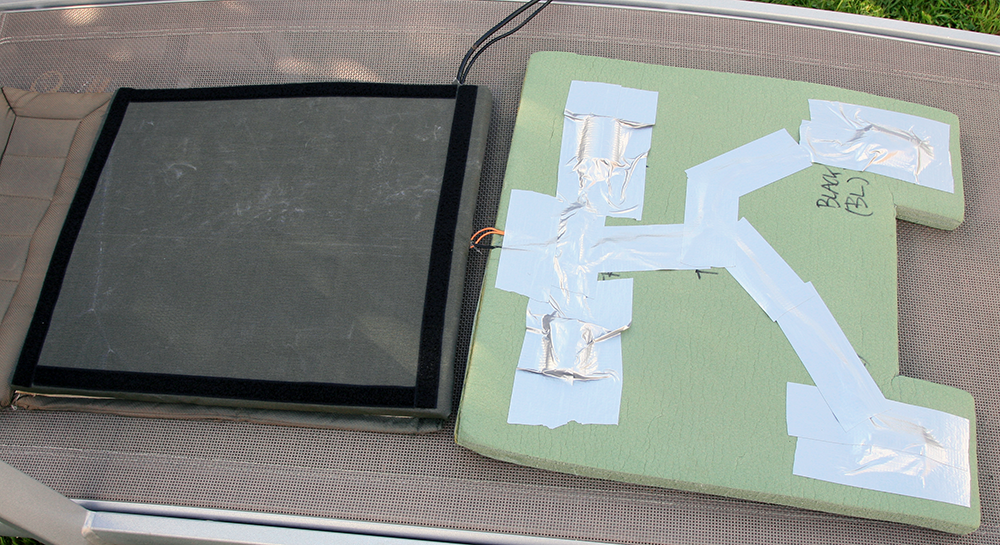
Placing the Aces 2 cushions on top of the Gametrix shows where the best possible placement of the motors.
The two lower back motors can stay where they are, the two upper motors must be moved a bit inside (and lower) but the good news is that all 4 motors are within the lower cushion area of the back rest cushion which fortunately is removable on the real cushion. It’s simply attached with Velcro.
This is absolutely great because as the real back rest isn’t very thick (nor comfortable) we can’t really embed the motors straight into the backrest cushion – you would end up with big bumps.
But we can create a separate as thin as possible cushion that holds the 4 motors and that can be sandwiched with Velcro between the two component of the real aces cushion, the new cushion is completely separate and will be velcroed from its two faces to the aces seat cushions.
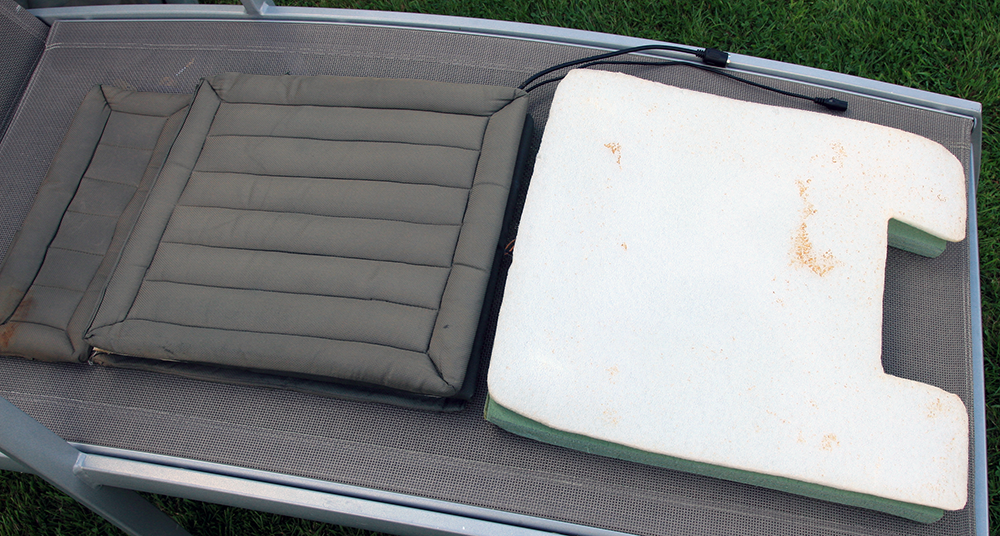
The seat pan cushion has a zip on the back that you can open and you will find 3 layers of green hard foam glued together, slide the hard pressed foam outside the cushion. this is where we’ll work.
We will mark the best location for the 4 motors (which are actually only 2 channels with 2 motors each and not 4 separate channels as the ones on the backrest.
the hard pressed foam will be cut to allow the motors to slide in their slots and I will add a further layer of thin foam on top to cushion the motors as they are thicker than the two layers of hard pressed foam I found in my aces cushion.
WARNING: from this moment, there is no turning back.
You will DESTROY your Gametrix cushion and you probably WILL NOT BE ABLE to reassemble it !!
It’s a point of no return. You proceed at your own risk and do not come to me complaining that I should buy you a new Gametrix.
The Gametrix cushion is made of three layers all sewed and glued together. The front layer is false leather, the inner layer is a white light foam and the back layer is black light fabric. The inner layer is glued to the front layer and sandwiched between the two is spray foam which is glued the two layer together sandwiching the motors between them.
The Gametrix is cut open at the orange sewed borders starting at the connector plug which is unscrewed and saved for later use.
Cut the wires of the orange border on about 40 cm up and 40cm down. you do not have to open the whole layer free from the Gametrix cushion. I opened just enough to get Inside with my hand to free the motors being careful about the wires which are glued and sandwiched as well, so be careful.
There is also a PCB located centrally where all wires from the motor meet and where the 2 big wires connectors originate from. Be also very careful unsticking this from the glued foam. Don’t go in there with any cutter, do it by hand.
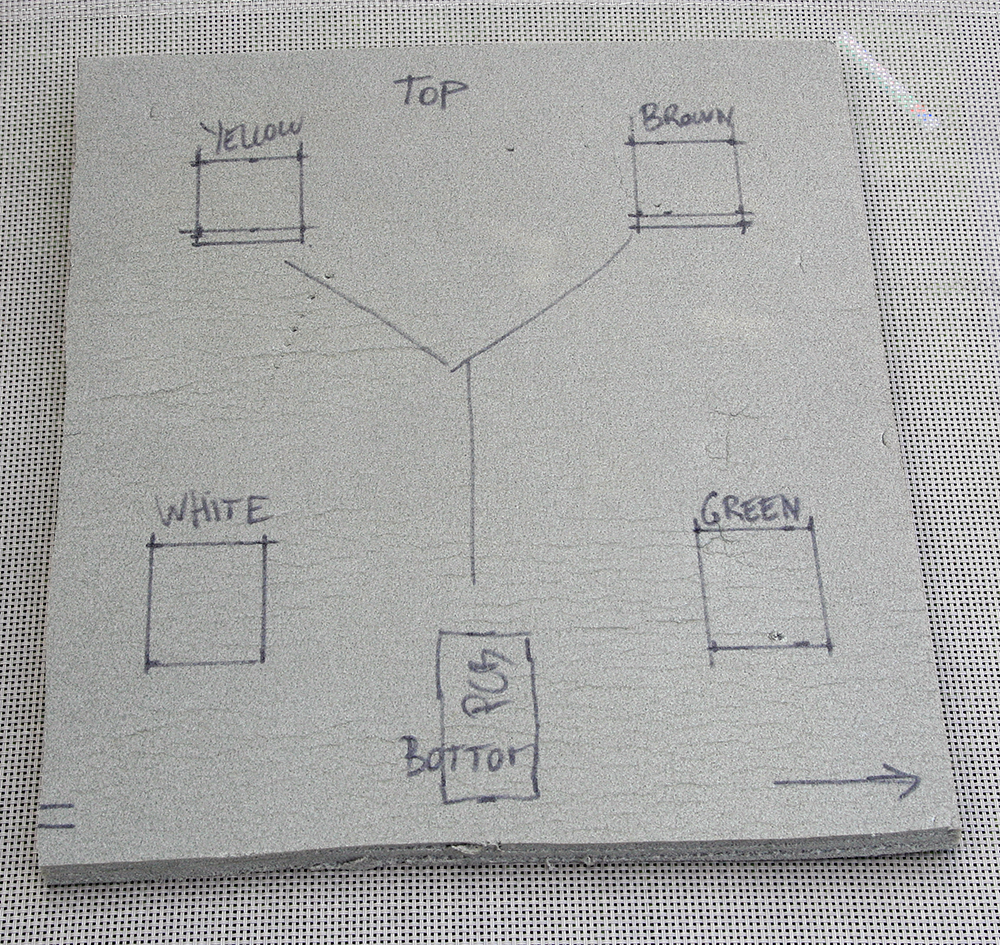
As you slide your hands Inside the Gametrix innards note the colours of the wires and report them on a drawing or straight on the cushions as I did.
Mine is wired according to the following:
backrest
– yellow wires: top right motor
– Brown wires: top left motor
– white wires: bottom right motor
– green wires: bottom left motor
Seat pan cushion
– black wires the the two left side motors
– orange wires to the 2 right side motors
The location of the motors is marked on the original hard foam of the butt cushion making sure to relocate the two forward motors just under my legs.
Here starts the conception of the independent sandwiched cushion.
I sourced two sheets of hard pressed foam looking like the ones originally Inside the butt cushion (green in the above pictures)
I glued them together with spray glue and let them dry under a bit of weight overnight.
Then I marked the position of the motors and the wire harness, not forgetting the location of the PCB.
Then I simply cut open the two layers of hard pressed foam at the location of the 4 motors and cut only one layer (the top one) to make room for the wires
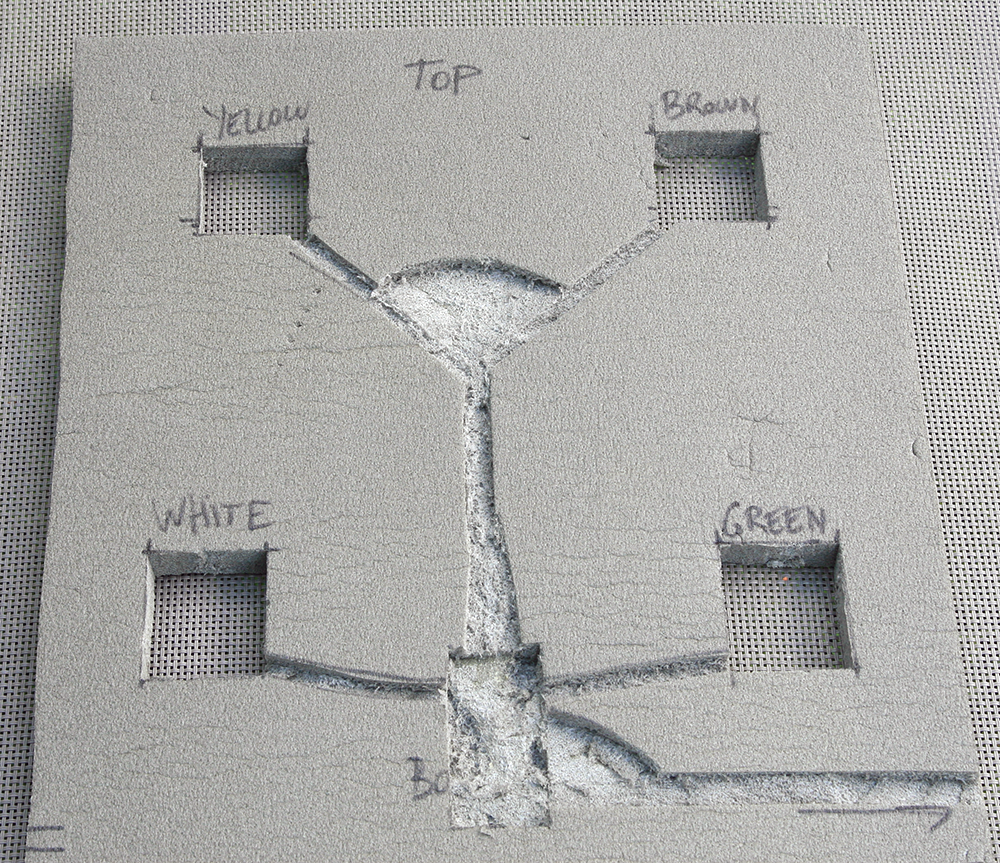
I made the same process in the green original hard pressed foam of the butt cushion. I didn’t cut through on this one, I dug into the two top layers and left the bottom layer as a base to avoid the motors going completely through.
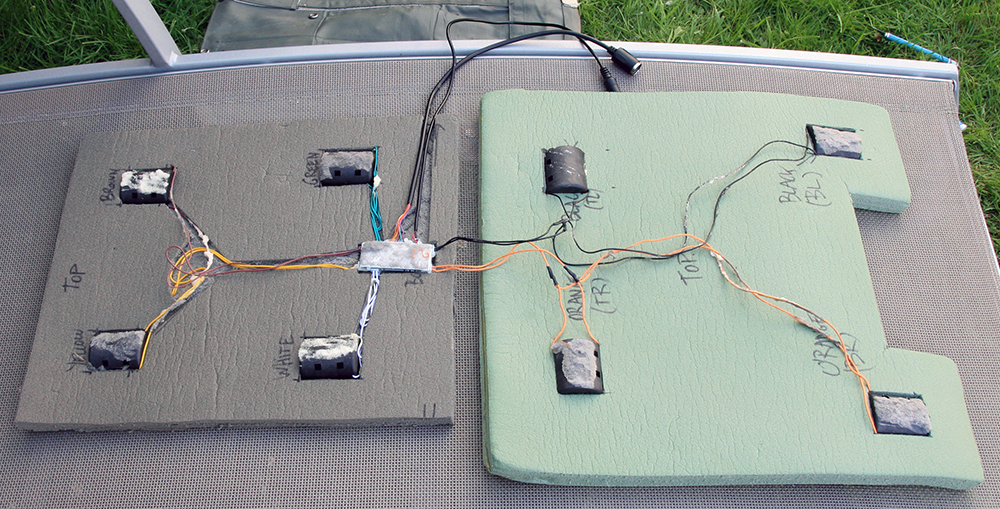
Checking the top back rest cushion on top of the new sandwich cushion:
The motors and wires, once placed correctly have been protected by duct tape. This was done on the two faces for the back rest sandwich cushion – and only on the top of the butt cushion since they don’t go through.
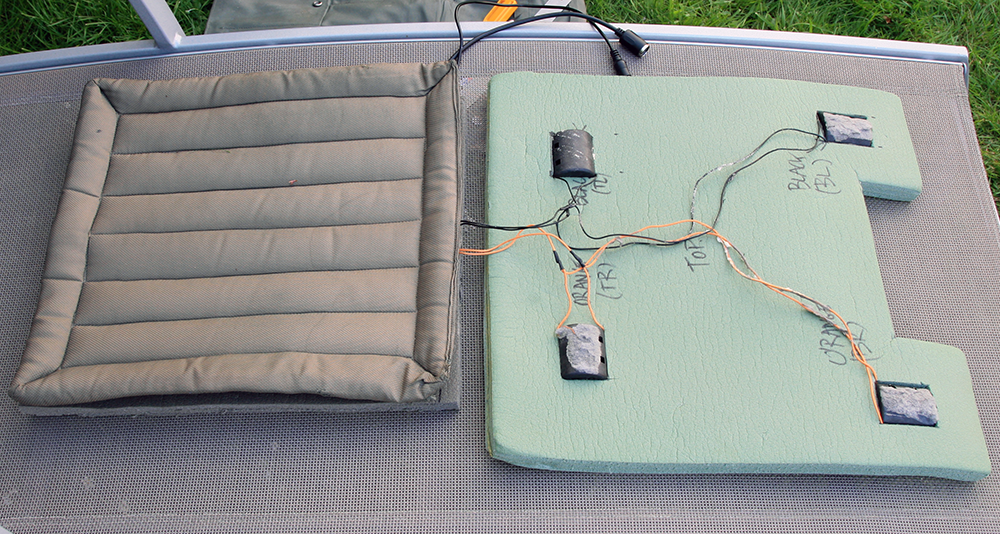
The next step is cosmetic mostly and consists of masking the edges of the newly created cushion with khaki coloured fabric. (Although I ended up with covering the top face of the cushion as well. The fabric can be either glued or sewed through the hard pressed foam. As it was my initial test it’s actually secured with duct tape on the back side and it’s so strong that it became eventually a valid way to secure the fabric on the foam.
It is also a step that will allow me to overcome a failure of the glue on the Velcro. In case the glue doesn’t adhere very well then I can sew the Velcro on the fabric ensuring good cohesion between the different materials. Luckily nowadays they manufacture Velcro specifically designed to be glued on fabric. So I should be fine. But a B plan in that aspect was necessary. I have often see that glue fail previously…
You will need to make two holes in the fabric to let the wires that go into the butt cushion pass and another bigger hole to let the external connectors wires go out of the cushion. (More on that later)
The Velcro is glued on both side of the sandwich cushion. Obviously following the Velcro on the original cushions. The glue adheres perfectly on the fabric. We won’t need needles to sew on the fabric – and that is good news. The Velcro on the real cushion has also considerable wear and is not very strong. That will most definitely help the new Velcro remaining glued on the sandwich cushion. Indeed industrial Velcro with a very hard grip would rip it apart.
I did not want to initially add a third layer of foam on the sandwich cushion because I wanted it to be as thin as possible. But after I made my first flight with the Acestrix I could feel the 2 top motors in my back. So they either need to be placed somewhere else or better cushioned with an extra layer of hard foam. So my advice here is to add an extra layer for comfort.
I added an extra layer (because I had it) on top of the butt cushion. The real aces cushion is a bit harder to reassemble but the test flight told me it was the right thing to do as the 4 motors on the butt cushions are just perfect. Nice feedback, no discomfort, just great.
I’ll need to add the same extra layers on the sandwich back rest cushion, after all comfort si important too.
The seat pan cushion cover has been put back over the modified hard foam and the backrest is velcroed back in position.
The Gametrix logo has been removed from the Jetseat and I will consider velcroing it on the Aces backrest. But I’d need a logo saying Acestrix, it’s much more striking!!
Few things are left to cover:
Managing the wires between the two cushions and managing the exit holes of the wires.
At this time the zip at the back of the seat pan cushion is closed till the wires with one side open, I’ll address that when I address the connector issue.
First test flight was made yesterday and it’s just great.
The only issue is that I need to add an extra layer on the back rest cushion for more comfort. Motors placement are satisfactory and I can finally feel the seat pan motors better due to the better placement of the two forward motors.